Wednesday, August 31, 2011

Birthday Dinner on the Patio

Today I'm joining Tablescape Tuesday at BNOTP:

To celebrate the August birthdays in our family, we're having dinner on the patio tonight. We'll wait 'til evening when the breezes will cool down the air a bit, but I will show you our party all set up and ready to go in daylight.I've set the table with a white linen jacquard tablecloth since it's a special occasion. But to keep it more relaxed for the outdoor setting, I added woven straw placemats in yellow.

I set each place with a clear glass plate and topped it with a china salad plate in the "Trilby" pattern by Noritake. The china has a narrow band of tiny yellow and white daisies and a silver border.

Silverplate flatware is vintage (inherited), pattern unknown. White linen napkins are tri-folded on the diagonal, rolled a bit, and popped into the glass goblets.

Our centerpiece tonight is composed of two glass hurricane lanterns; one is bubble glass and the other is smooth glass. Inside each, a tall white pillar candle is protected from the breeze. Clear glass marbles bring a little subtle texture to the table. The leafy swag is handmade of two green fabrics cut in numerous leaf shapes, hot-glued to green garden twine. I found instructions for it on a blog, but I forgot to get the address. If anyone knows, please let me know so I can give credit.

The yellow puff flowers are made of tissue paper; instructions are everywhere in blogland.

We'll be enjoying a seafood feast tonight, followed by miniature birthday desserts. Happy birthday, J, H and G!

Saturday, August 27, 2011

Pillow - Finished

As the guest room nears completion, I felt the bed needed a little extra something. I'm not much of a toss (or is it throw?) pillow person, but it seemed that that was just what the bed needed. I had several yards of fabric left over from making the curtains last year, and two old sofa pillows that had seen better days.

Fist off, I ripped open the old pillows to take out the pillow inserts. But they were only filled with layers and layers of batting, not true pillow inserts.
No problem, I thought, I will cover the stacks of batting with muslin and make my own inserts.It was quite easy.

Then I cut one end of the fabric on the diagonal to make bias strips for piping. I had extra fat cording for my piping; I've never made piping this fat before. It was harder to stitch.

I cut squares of fabric for the pillow front and back, and then I pinned the piping in place, rounding off the corners to made a more modern pillow. The big chore was to get my stitching close enough to the piping so that it didn't gap. It took something like three trips around the pillow to get it right.

Tada!

I'm linking to Met Monday at BNOTP.

Friday, August 26, 2011

Yard Sale Score

This morning on the way to work I spied a yard sale sign, pointing down a little country lane (one of the few remaining in our area). I drove up to a huge brick mansion and looked over the goods spread across their expansive lawn. Not much caught my eye, but this bedspread/tablecloth or whatever it was. Turns out it was FREE because it had some big holes.

But the holes were off toward the ends and I could cut and sew.Cut, cut, cut the good part out. Sew, sew, sew the raw edges. And I end up with a nice, large throw for the chair or sofa. I may or may not add more fringe to the edges.

I gave it a long soak in Oxyclean before I threw it across the chair.

Sunday, August 14, 2011

Drying Hydrangeas

Hydrangeas are one of my most favorite flowers and it is so sad to me that they last such a short time. But one day I discovered that I could dry them and keep them for a long, long time.

I've since experimented with different methods of drying them, but I always come back to my original method because it works the best for me. Here is what I do:

I cut several blooms first thing in the morning and shake them upside down to get out as much yard crud as possible.

Then I pull off all the leaves except one nearest the blossom. The leaves aren't all that pretty when they dry, and they usually get in the way of bunching the dried blooms in a vase or pot. So they come off.

Next I clip them upside down to clothespins or bull clips. I have a magnetic knife strip behind the wood fascia trim over my kitchen sink. I keep bull clips on it, and this is my primary place to hang my hydrangea blossoms.

Or, I clip them to skirt hangers and hang them on the closet rod. They hang there about three days and then they are dry:

That's all there is to it! Now you can go arrange your dried blossoms in a lovely cluster.

Saturday, August 13, 2011

Thrifty Finds

On our weekend runnings-around today, The Professor and I spotted a church rummage sale on the main road. We took a quick peek and look what I found:


An old mahogany (I think) sewing or knitting table! It was originally $60, marked down to $40, and everything at half price on the last day. That brought it down to $20. Really.
See the two rounded areas, one on each side of the drawers? Those are deep pockets meant for storing a lady's hand sewing or knitting next to her chair. So clever!
Here is how they open:
I love the leg detail:

All it needed was a scrub with Murphy's Oil Soap, a few screws tightened, and three or so tiny nails hammered into the bottom of one of the rounded pockets. I can do all that. Easy.

It's now an end table in the living room.

Ignore the flowery furniture; it will be getting new slipcovers as soon as I get brave enough to tackle that project. (But window coverings come first.).

Friday, August 12, 2011

Old Canning Notes

As I made my fourth batch of pickle relish this summer, I came across a thin binder pushed deeply back on my recipe book shelf. I vaguely remembered it; it's where I started keeping my canning information many years ago. I flipped through the pages and found this page:It's my hand written record of what I canned and froze every year, beginning in 1980. I read that in 1980, I canned 30 pounds of cherries that cost me 60 cents a pound!

In 1990, I canned approximately 220 pounds of fruit, plus 50 pounds of tomatoes. I wonder how I did that, since I had a 6 month old baby, a not-yet-two-year old, and a six-year old. And we started homeschooling. I must have been incredibly busy. Or dumb. For sure, I had more energy than I do now!

I skip a year here and there in the records, but for the most part, I canned at least something most years. And then there is a gap of 11 years. It looks like I canned nothing from 1999 to 2010. But I know that's not true; I still canned but I did less of it. In the busy-ness of life, I guess I forgot about keeping canning records, because in that 11-year spread, we lived overseas, we finished high school for all three children, they all started college, two graduated from college, and we had two weddings.

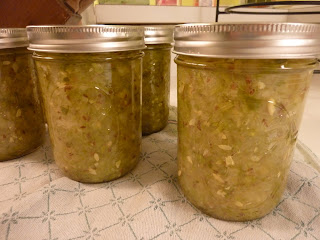
Now I'm happy to say that 2011 is filled in: I canned 6 half-pints of sweet pickle relish, 10 pints of dill relish, and 9 pints of bread and butter pickles. I also froze 9 pounds of blueberries that I picked. The pantry's looking good!

Friday, August 5, 2011

No Wreaths for Me

Sometime back I came to the realization that our front porch is a very poor place to hang a wreath. At first, it seemed like a great place, with the solid roof overhang and the recessed door.

But I soon learned that birds are drawn to our porch for some reason, and they insist on building nests where ever they possibly can. If a wreath is hanging on the front door, then that's the favorite nesting spot. No wreath? Well then, light fixtures might hold a nest (wrong!). Or wall pockets sprouting fake leaves are probably ideal (wrong!).

I have had uncountable decorations pecked to shreds by the local bird population.

I was finally resigned to the fact that I wouldn't be able to have any welcoming porch decorations without having to be at war with the birds.

Then I found my old wrought iron plate hanger I had stashed in the attic - and inspiration struck. Birds can't damage it (any bird that tried would end up with a bent beak). Ironstone plates hanging on it couldn't be torn to shreds either. So I shopped the house and found three seasonally-appropriate plates that could accent the front porch. Currently, I'm using a subtle patriotic look.Now that I have a vision for the porch, I am keeping a look-out for other plates I could use here. I already have lots of Christmas plates and spring floral plates. I still need:
A patriotic flag or star plate
Autumn leaf designs or brown turkey designs
Perhaps Birthday designs
Easter designs
More reds, perhaps florals, for multiple uses

The red plate is from Pier One, this year.
The white plate is from TJ Maxx, this year.
The unfinished metal "Welcome" sign is from Pick Your Plum, this year.
The blue scenic plate is an antique, purchased years ago.

Monday, August 1, 2011

Chandeliers Galore

I have been busy, busy, busy painting chandeliers this week: eight, to be exact. Our church sanctuary is being renovated this summer and some of us ladies decided it was high time for the bright brass chandeliers to go. But at $200 a pop, it just wasn't in the renovation budget to replace them.

So we proposed we spray paint them black, and those new to the idea of do-it-herself were horrified. You know, we might ruin church property or something. But we persevered and the final result looks fabulous.This is the before view; we were getting ready to begin renovations the next day. Two brass chandeliers are barely visible in the top right corner.
Day 1: The property manager borrowed a lift to take the chandeliers down from the ceiling. I washed them all and removed about 12,000 dead lady bugs. Ick! Then I covered the light sockets with aluminum foil and hung them outside.

We set up a hanging system using three ladders on the grass. The lawn badly needed mowing, but that is good, because once we finish painting, the lawn kid can just mow the paint overspray off.

It was 90-plus degrees outside that day and the humidity was close to that. All my helpers had backed out at the last minute so I went at it alone. After I had primed three chandeliers it started to rain, so I finally had to quit.

Day 2: I rounded up a couple of helpers. Here they are putting on the final primer coat. After the primer, we went at them with Krylon Black Satin paint. It took two of us to check and recheck for missed spots. Chandeliers can be complicated to paint!

A final coat of Crystal Clear by Krylon, and then a final drying. As each chandelier dried, we replaced the brass chain with new black chain, and our friend on the lift rehung them.

All eight are back up (only four are visible). They beautifully show in silhouette against the new gray paint of the walls. All the renovations are complete here too: new platform and carpet; new pillars and trim around windows; new wall paint.

My heartfelt thanks to friends Mary Jo and Kathy for your painting help, and thanks to Dennis for playing electrician/lift operator/engineer!

I'm linking to Met Monday over at BNOTP.