Tuesday, October 30, 2012

Skeleton Leaves

 Greta and I played around with another Pinterest idea: turning leaves into skeletons. No, I don't mean that they become the shape of a human skeleton. Instead, they lose the fleshy part of the leaf and all that remains is the skeleton of the leaf

It was fun to try it out, but I'm not sure it is worth it to me to go to all the work it takes to skeleton-ize them. 

The Pinterest pin was only in Japanese and photos so we had no instructions to read. But here's what we guessed we were supposed to do: we put about one cup of washing soda (buy it in the laundry aisle) in a big pot, added a lot of water, and brought it to a boil. Then we tossed in leaves: dry, crisp ones; dry but not crisp ones; and even some green ones. We boiled and boiled them, two hours maybe?, until I decided that they would not come out of the pot with all the fleshy parts boiled away. 

By this time, the fresh green leaves had turned to mush - something like overcooked spinach. Well, that was a fail. Maybe they should have come out of the pot after 10 or 15 minutes.

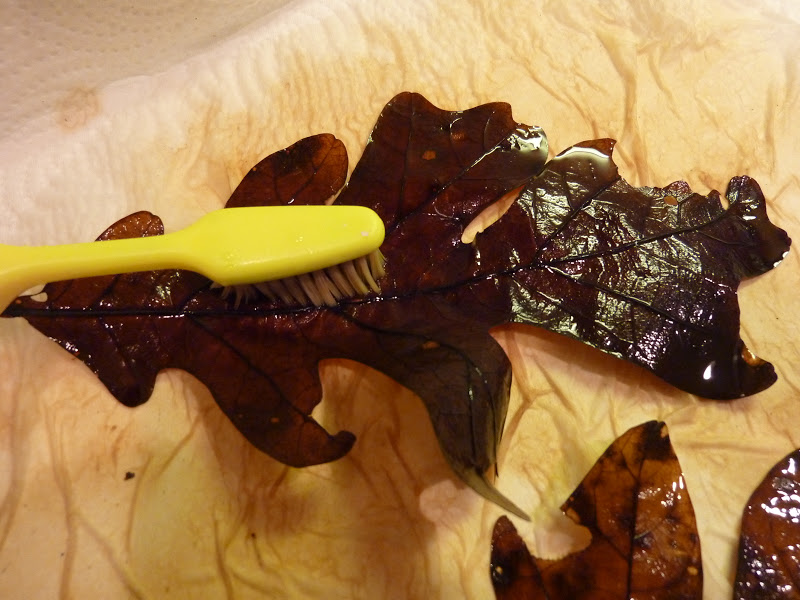
I started taking leaves out one at a time, and laid them on a thick layer of paper towel. With an old toothbrush, I scrubbed on the backside of each leaf, up the center vein, and out each side vein. Eventually, I could see the fine veins appear. But it sure took a lot of scrubbing. And lots of holes appeared where, I assume, I scrubbed too hard.

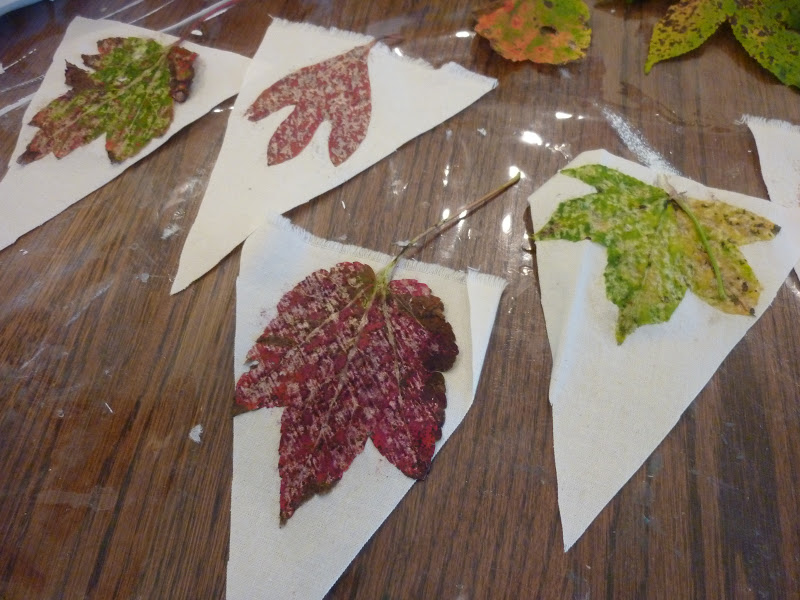
I never got my leaves as "clean" as the Japanese photos showed, but maybe it was because I was using a different leaf variety. After they air-dried, I ironed the skeletons flat between sheets of waxed paper.
 
This isn't a project that I plan to do again, unless someone can suggest a fabulous use for skeleton-ized leaves.

Thursday, October 25, 2012

Pinterest Craft Day #13

"Leaf Art" was the theme today for our Pinterest Craft Day.

Greta made a cute little banner by pounding fresh leaves onto muslin triangles.
Here she has finished pounding the leaves, but she has not picked the moist leaf pieces off the muslin yet.

Here is a finished muslin triangle...

...and her leaf banner.

Kathy and Adie made marbled leaves using shaving cream and acrylic paint.
After cutting leaf shapes out of cardstock, they covered the bottom of a plastic container with shaving cream. Next they swirled in several layers of acrylic paint, and marbleized it with a skewer. They poked the leaves into the mess, pulled them up, and let them sit to soak in for a few minutes before using a squeegee to wipe off the excess paint and shaving cream.

 Marbleized and drying.

  
 Leaves used in a banner.

Heather didn't do a leaf project; she worked on her project from last session. She is continuing work on her stenciled canvas with old keys.

She cut key shapes from paper and laid them on a bronzy painted canvas. Then she began spray painting over the whole thing. She has many more layers of blue spray paint to do before she peels off the paper keys to reveal her bronze keys under the blue paint.

Saturday, October 20, 2012

A Fine Day for Garage Sales

Yesterday was beautiful: warm but not hot, a slight breeze, and lots of sun. It was a perfect day for garage saling and Heather was as anxious as I was to go out. We made a huge circle through our part of town and found plenty of sales to keep us busy.

Heather scored some pricy Tupperware containers from a dealer, as well as some lovely vintage things.

I nabbed stuff from the mundane to the fun:

 A car booster for the grands, $2.

 Toys for the playroom, $2. The doll was free.

Lacy vintage fun. A floral handkerchief, 75c; a rectangular doily, 25c; and a round lace tablecloth, $5.

The lace things need a long soak in Oxyclean and then they will be much whiter, rather than ecru.

Friday, October 12, 2012

Nasty Grease Be Gone!

Pinterest is wonderful. Yesterday I found directions on de-greasing the vent filter the easy way. The instructions said:
Fill your largest pot with water and bring it to a boil. Slowly stir in 1/2 cup baking soda. Do it slowly because it will bubble up for a moment with every addition of baking soda. Then stick your hood fan filter in the pot and let it sit. Turn it end over end, and let the other end sit for awhile. The boiling water literally boils the grease right out, and it comes out sparkling clean!

See how murky the water is? That is all the grease boiling out of the filter. 

After it was clean and the water drained off, I had to keep it propped up over the sink all night, but it was still damp in the morning. I clipped it back in place anyway, and it dried eventually.

Tuesday, October 9, 2012

Pumpkins for the Mantle

After great success with decoupaging foam pumpkins for church decorations, I decided to make some for myself. I waited until Michael's had the carvable pumpkins at 50% off, and then I bought several in sizes that would fit on my mantle. 

I looked for autumn-friendly quilter's prints at several stores until I found the colors I was looking for at Hancock Fabrics. No oranges and reds for me! I wanted to stick to the greens and yellows of my home decor, but I found only greens and browns. I decided that would work just fine.

The process was the same for these pumpkins: a coat of primer (this time I used gesso), tearing the fabric into strips and applying to the pumpkins using Mod Podge, and a final coat of clear sealer. Easy, easy. 

 A large pumpkin in a green print, and a smaller pumpkin in a tiny dark brown print.

On the left side of the mantel, a large pumpkin in the reverse print as the green print, and a smaller pumpkin in a smaller green vining print. 

 A few small china pumpkins are scattered throughout.

 This shows the scale of larger pumpkin to the smaller pumpkin better.

 Large green print up close.

One candlestick has a bit of leftover trim from the pumpkins we made for church.

Wednesday, October 3, 2012

Tile Tray


Just before I left for vacation I tried my hand at tiling for the first time. I remember years ago noticing that some Girl Scout troops got to do little tile projects, and I hoped my troop would do it too, but we never did.

This was an easy beginner's project. I've had the tray for some years; I painted it white soon after I bought it. At Home Depot, I found a sheet of glass tile, 12"x12". It was slightly too big to fit in the bottom of the tray, but I eyeballed the fit, and it looked like if I cut off one row of tiles in each direction, the rest of the sheet would fit perfectly. 

I bought the sheet of tiles and some grout, then I went home and googled what adhesive to use. In the end, I just used good ol' Elmer's. It made a good bond, and the sheet of tiles did fit perfectly after trimming. Spreading the grout was a no-brainer.

I've thought up many uses for this tray all over my house. You will probably see it in many future photos!