Saturday, June 30, 2012

Sparklers

I made Fourth of July Sparklers for a treat at the symphony orchestra outdoor concert tonight. Easy, easy treat to make. You will need:
A 10-oz bag of pretzel rods (I used Snyder's of Hanover)
A tub of white icing
3 bottles of patriotic sprinkles (1.75 oz)

Cover a rimmed baking sheet with waxed paper or parchment paper. Break the pretzel rods in half, if desired. Empty a bottle of sprinkles onto a plate. Open the icing tub, remove the seal, and nuke icing about 15-20 seconds. Stir well. 

Dip the broken end of each pretzel in the tub down to the bottom, remove, and allow to drip back in the container. Roll the icing portion in the sprinkles. Place on the waxed paper. Repeat with remaining pretzel halves. When complete, chill in the refrigerator an hour or so.

You can do all the little broken pieces in the bag too. 

You can keep the pretzels whole if you want, but they don't have the same sweet/salty balance. We liked them better broken in half.

Friday, June 29, 2012

Holiday Weekend Deals

I got some great grocery deals today, combining sales or BOGO and coupons. This is what I snagged:
Mueller's pasta, BOGO and 55c/2 coupons: 52c each box
Dial soap pumps, $1 each and 35c coupons doubled: 30c each
Chinet plates 72 ct, BOGO: $3.20
Kraft shredded cheese, $2 each and 55c coupons: $1.45 each pkg
Reynolds Wrap non stick foil: $2.99 and 75c coupon: $2.24
Al Fresco sausages, $5.49 (regular price), $1/2 store Q and $1 mfr Qs: $3.99 each
Coleslaw BOGO: 65C

The Chinet plates are for our three away-from-home picnics this weekend; the cheese is for the freezer; the pasta is for hot-day salads; and I'm glad to finally get a good deal on non-stick foil. I've been wanting to try it.

Thursday, June 28, 2012

Pinterest Craft Day #8

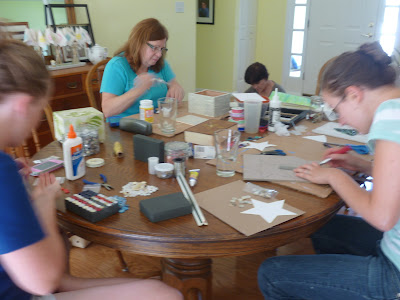
This afternoon five ladies met around my dining room table to make sheet music candles. We thought this was a really fun idea on Pinterest.

A few days ago I raided our decorations closet at church for a dozen or so white and cream pillar candles that have seen better days. I already knew fresh candles were in the new budget, so I felt confident that walking off with the old, wonky ones wouldn't hurt anyone's feelings. But just to be sure, I passed it by our Worship Leader; he gave me the thumbs up. I also found, deep in a dusty closet, an old, outdated hymnal from two decades ago. We no longer use this edition, so I knew nobody would miss it either. 

At my dining table today, we first tore pages from the hymnal. We ripped the pages down to the size to fit the height of the candle, and then we tightly wrapped a page around the candle and pinned in place. 

Using a heat gun (best) or blow dryer (ok), we heated the candle until the wax started to melt and bleed through the paper, working all the way around the candle. That bonded the paper to the candle. We found it best to immediately roll any paper edges on the table to fully bond. Those edges like to pop up. 

After making some candles with music we decided to branch out and try different papers. We already knew that scrapbooking papers would be too thick, so we tried another Pinterest technique: color copy onto a piece of tissue paper or tracing paper. How did we do that? First cut the thin paper longer than a standard piece of copy paper, and barely narrower than the copy paper. For example, cut the tissue or tracing paper about 8" wide, and 13" or 14" long. Stack the thin paper with the copy paper, then wrap the excess of the thin paper to the back of the copy paper and tape it in place. Run it through the copier as usual. (Make sure you select "color"!) Untape it and there you have thin,  pretty paper to melt to your candle. And that's it!

The wax may run down the candle; that's fine. You can roll the candle on your work surface whenever you want. The drips will embed into the candle and the edges will adhere better. See the pushpins on the candle? They hold the paper in place until it's well melted.
 
 A fave rose print scrapbook paper turned into candle decor.

 Another favorite paper decorates a candle.
 
 We especially like the music candles clustered together for impact. 

Monday, June 25, 2012

Frames and Mirrors

I've gone a full year without artwork on the dining room walls, ever since I painted the room last May. See the corner of the dresser and the big, bare wall beyond the dining table, above.

I needed inspiration and a BIG mirror. Well, I got the big mirror last month. Heather had it stored in the attic and then she decided she would never hang it above her boys' dresser. Never. Not with Thomas the Tank engines and books and Brix Blocks flying through the air on a regular basis. So she gave it to me and I knew it would be perfect above my dining room "china cabinet", which is really just a dresser.

When Greta stopped by this morning, I snagged her help. That mirror is HEAVY! We weighed it just to be sure we bought hardware that would hold the weight. It weighs 33 pounds. After a run to three stores, we had hardware in hand and we got that thing up on the wall.

Next I wanted to add some artwork on each side of the mirror to fill out that big, blank wall and begin to balance the 12 feet of tall bookcases on the opposite wall. Greta helped me with that too...

 Tracing the frames on brown paper, cutting out the templates...

 taping them to the wall, pounding in the nails...

 And hanging everything up. Thanks, Greta!
 
 Two chairs to fill out the wall a little more, and a little r,w, and b for the season.

Saturday, June 23, 2012

Kitchen Closet Finished!

In my last post, I had cleaned out and repainted the closet in the kitchen. Over the next few days, I gathered up all my china, glassware, serving pieces, baskets, and all the other food-related items I use when entertaining. They have been scattered all over the house, from bedroom closet to laundry room to dining room and garage.  I slowly worked my way up from the floor, filling the shelves with it all. 

I purged (again) as I worked. Wow. I sure have a LOT of stuff. Some pieces I've held onto for decades, even though I haven't used it in decades. I guess I thought I "shouldn't" pass it on if someone gave it to us for a wedding gift. So silly.

I have officially renamed this closet the China Closet. Many historic homes have a china closet instead of a china cabinet or hutch, so I feel I'm in good company.

Going from top down and left to right on each shelf, I have: (shelf 1) glass beverage dispensers and large apothecaries; (shelf 2) inherited family china and vintage glass dessert sets; (shelf 3) china teapots and small pitchers; (shelf 4) our wedding china; (shelf 5) china Christmas plates, china plates for decorative uses, and china plates collected from our travels; (shelf 6) goblets; (floor) tall vases and baskets in open bins.

On the very top shelf which doesn't show in this photo I have a green depressionware berry set and smaller glass apothecaries.

I love that I can simply open the doors and take out whatever I need.

Thursday, June 21, 2012

A Redo for a Closet

After hurting my back on Monday (or maybe it was Sunday), I've been rather slow this week. Lots of lazing around and doing nothing. Yesterday I fell asleep while reading, and then I couldn't go to sleep last night. I decided I've had enough of that, so I got busy on this sad, sad closet. 
This rats' nest of cords and electronics is gone now. It's new home is the office closet, but some has been completely removed. Yay!

The guys moved all the computer equipment out last night and that freed up lots of space. It also exposed all the grime on the walls! Since I needed to empty the closet and reconfigure it anyway, I decided to take the extra time to clean, patch, sand, caulk, prime, and paint.

 Lol. Some people have phone jacks in their closet...and electric outlets too!

 It's still a work in progress, but here is the closet with one coat of primer. Check back later for the finished closet!

Thursday, June 14, 2012

Pinterest Craft Day 7


Today for our Pinterest Craft Day, we met in my dining room to make various button crafts. Each lady chose her fave button craft from our joint pinboard and brought all the supplies she needed for that craft.

Heather created a button flag on a chunk of 2x4. She had previously painted the board in chalkboard paint, but she didn't like it as a chalkboard, so she recycled it for her flag. So cute!

Greta cut a star from heavy cardboard and then painted it pale blue. She completely covered it in two layers of mother of pearl buttons. She can use it to decorate for July 4th, for a beach theme, or for Christmas. So versatile!

Adie cut a piece of cardboard to fit a black frame she already had. She covered the cardboard in a thin layer of batting, and then she covered that with linen fabric. She created a Christmas tree with buttons in shades of green. Merry Christmas!

Joyce didn't feel like digging through her boxes in storage to find her button stash, so she decoupaged a cigar box she found at the thrift store. She used pages from her book clock project as her decoupage paper. So thrifty and resourceful!

Ellen didn't want to do a button project, so she started painting a cute train on a canvas for her grandson. She is an excellent artist and she drew her own train. It is adorable!

Mary Jo brought her buttons to make a button bracelet, but she had to go rescue her daughter from car troubles as soon as she arrived. We hope she can stay and craft with us next time.

Basic 7 Smoothie

Some time ago I read online that there are seven foods we need to eat every day. I don't know if it's true or not, but the article seemed to have good reasons for each food. And they weren't trying to sell anything. So I wrote them down and sometimes I read through the list and plan to eat them all in one day.

What are the seven? 
Yogurt
Tomatoes (or papaya, guava, pink gr.fruit, watermelon)
Walnuts (or almonds, peanuts, macadamias)
Spinach (or romaine)
Oats (or flax seed, wild rice)
Carrots (or sweet potato, butternut squash, mango)
Blueberries 

It's hard to keep up with making sure I actually eat all of them in one day. And then the other day I wondered if I could make a tasty smoothie using all seven ingredients. I thought that would be an easy way to eat them each day. Using my Vitamix, here is what I came up with. 

Seven Things Smoothie
1/2 c yogurt
1/2 c watermelon cubes
8 raw almonds
One handful fresh spinach leaves
5 small kale pieces, optional
1 T flax seed (or 1/4 c oats)
2 slices mango (or 1/2 carrot)
1/4 c fresh or frozen blueberries
1/2 banana, for thickening
6-8 ice cubes

Start on low speed, work up to full speed and blend for 2 minutes. YUMMY!

Tuesday, June 12, 2012

Senior Discount Days at the Thrift

I hit Goodwill this morning, not knowing that Tuesday is Senior Discount Day - 25% off for those 55 and older. Happily, I qualify now. What did I find? A few fun goodies:

A cute doll chair that I plan to paint because I don't go for words on my furniture or walls ($1).
A 3-piece Pyrex refrigerator set, looks new ($4).
A separate Pyrex bowl missing the lid, but I can order one online. ($1.50).
A large, black wire basket ($1.50)
A bag of 1,000 price tags that we can use for our garage sales (79c) 
A vintage baby book, never written in (79c)
A decorating book that I plan to cut up ($1).

A few days ago I also found a couple of things at a garage sale:
A cell phone clip-on case (10c)
A biography of Juliette Gordon Low (10c)

The final item in the photo is hard to see. Look on the far right side, the pile of beige things. Those are nine 12" square ceramic tiles. I picked them up, FREE, on my walk this morning. I had noticed a house in another neighborhood that often has junk piled around the mailbox, apparently awaiting the trash truck. But these tiles looked great to me. On my way home, the resident was in his garage. I got bold and asked if they were out for trash. He said yes. I asked if I could have the tiles, and he was happy to give them to me. He said he puts the stuff out for people to take if they want it. He told me he buys foreclosures and cleans them up and he finds all kinds of things. So I hope to find more goodies at his mailbox in the future.

Sunday, June 10, 2012

Beware the Rabbit Invasion!


Soon after we planted our tomatoes and herbs earlier in the spring, we noticed a flood of rabbits in our yard, our neighbors' yards, and the nearby field. Where did they all come from? These critters feel they have free reign in our yard, and that we are such kind humans that we planted goodies just for them! Ha. 

My first line of defense was to raise up the pots of herbs on tall logs, stood on end. They can't stretch that far and the herbs are safe.

On Saturday we decided that we needed to protect the ripening tomatoes from not only the rabbits, but the squirrels and birds too. So we pounded long stakes into the ground and then staked down bird mesh all the way around and up and over the top. We created a little mesh room, with the tomatoes safe inside.
Stay tuned for updates on how successful we are.

Elsewhere in the yard:
Apparently, squash isn't exactly a favorite food for rabbits as they don't go near it.

 The raspberries have their own built-in defense with all the prickles.

And hydrangeas just because they are pretty!
 

Friday, June 8, 2012

Pinterest Craft Day 6

We had a light turnout at our last craft day. But that doesn't matter - we still have fun no matter the numbers. We had decided that we would do a "book clock" at this meeting. Sadly, the one lady who really wanted to do it was unable to come at the last minute. 

Joyce came up with an interesting novel she found at the thrift store. It has a center medallion in embossed gold on the front, and a dot in the exact center of the book. This gave her a perfect place to drill for the clock face. And the swirls of the medallion are placed just right to look like 3:00, 6:00, 9:00, and 12:00. She had some difficulty cutting layers and layers of pages to make a spot to bury the clock works. And then more difficulty to get the clock to keep time, but all turned out well in the end.


Adie decided to begin working on a shadowbox that she had percolating in her brain for several years. She already had the black shadowbox. All she needed to do was pull out her childhood mementos and find a few yardsticks. She arranged her mementos on the shadowbox background, and then she cut the yardsticks to form dividers between her elements.  A few nails, a few shots of black spray paint, and a few straight pins to hold it all in place. Ready to hang!
Sorry about the poor quality photo; it is verrrry hard to photograph through glass.

Wednesday, June 6, 2012

May Thriftiness

I wasn't able to go garage saling very many weekends in May, and when I did get out, I didn't find all that much that I needed. But I did find a few things.

I found a beautiful, very heavy, silverplate pitcher in an upscale neighborhood ($5). My thought was that it would make a nice vase for the table in the church narthex. But maybe I'll keep it for myself.

Another day I found an old poetry book for children (50c), an antique shoe button hook ($3), and a box of vintage china angel bells from the 1950's at the very latest ($1). The bells are supposed to be a set of 10, but there are only eight bells and a little red gnome off to the side. I will add him to our Swedish collection.

I also picked up a pizza stone for David ($1) and I think that completes David's kitchen.

Tuesday, June 5, 2012

New Playroom for the Grands

Once we got the new office/studio set up in the last kid bedroom, it was time to turn the old studio "closet" into a playroom for the grandchildren. It's a tiny room, but they are tiny children, so it's a good match. 

First I painted the ceiling and all the walls. They were quite grey and discolored, perhaps from a build-up of smoke from the fireplace. The room has no windows and no furnace/ac vent, so it gets little circulation. I thought the big french doors opening into the room counteracted the lack of ventilation, but it looks like that's not the case. 

We bought a new cabinet at Ikea for toy storage.
 And then we raided the attic stash for outgrown toys from the aunts and uncles.

The rug came from the grandchildrens' own home, as did the play table and chairs. (Table hasn't been delivered yet.) I have ideas pinned on Pinterest for decorating the room; I'm looking at garage sales for fun vintage items for the walls.

Saturday, June 2, 2012

Digging Deeper

After getting all my fabrics sorted and stored in a much better way, I was inspired to look for more stuff to clean out. I found some boxes in the attic, put away in 2008 when we upended our house to have family move in with us. I figured it was time to bring these remaining boxes into the light of day. I found plenty of goodies to toss or pass on:
Old greeting cards
Old sewing patterns, but not "good" old
Beanie Babies
Several dolls
A cordless battery charger
A stack of printer ink cartridges for a printer that died before we used all the ink
Dried-up craft ink
A semi-broken calculator
Outdated P.O. forms 
A foot massager
Plastic(!) needlepoint canvas
Nursery decor

I even decided to let go of the fabric scraps from my wedding dress and bridesmaids dresses. Really now, it doesn't change my world to not own them anymore, and I haven't used them in a project in the past 33 years. Time to say goodbye.

After finishing the attic boxes, I hit the storage shelving in the garage. Wow. I really got into it and purged and organized for three days straight.
 Before, right side of garage. Not bad, but I want this wall to be empty.

 Before, left side of garage. Nicely shelved, but all these boxes need serious review
Out went:
Baskets
Christmas decorations we don't use anymore
A camp chair 
Crafts projects that went awry
Dated Christmas ornaments
Dead food
Drafting equipment
Dried-up paint cans
Duplicate tools
Empty boxes and cartons
File cabinets
Grass seed
Hardware for things we no longer own
Ice cream maker can for a machine we never owned
Metal shelving
Particle board drawers that are falling apart
A single weight
4 sofa legs
Stinky shoes
Stuffed animals
And much more!
Left side, after moving all the shelves and power washing the floor. Freezer is moved into more convenient place.

Basically, I divided the garage in half. On the left side, I boxed and shelved all the things I believe we should continue to own. On the right side, I stacked cardboard cartons, filled with the rejects, on old shelving we no longer need. The two sides ended up being about equal in quantity.

 Re-org in process but not yet finished

 This stuff is going...

I hoped to be able to post a picture of the finished product, but we have so, so much to get rid of. I decided we will have another garage sale later this month, and then I can post a picture of our clean garage. Our goal is to get both cars parked inside.